You can also read: Shortcuts 2c8 Modeling Tool
You can also download this document containing Tips and tricks in 2c8 Modeling Tool
In the section “Get started with 2c8 Modeling Tool” below we will go through these topics
- Create repository
- Create model
- Add description
- Create a document link
- Create a breakdown
- Create a list
- Create a layer
Get started with 2c8 Modeling Tool
Create repository
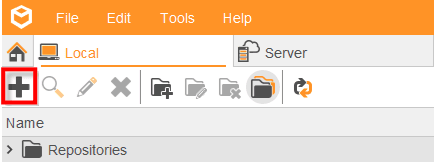
- Create a new repository by clicking on the plus sign in the menu.
- Double click on the name to open the repository.
- If you want to go back to the Repository Manager, click “File – Close repository” in the menu or close the window by clicking on the X in the top right corner to return to the Repository Manager.
Create model
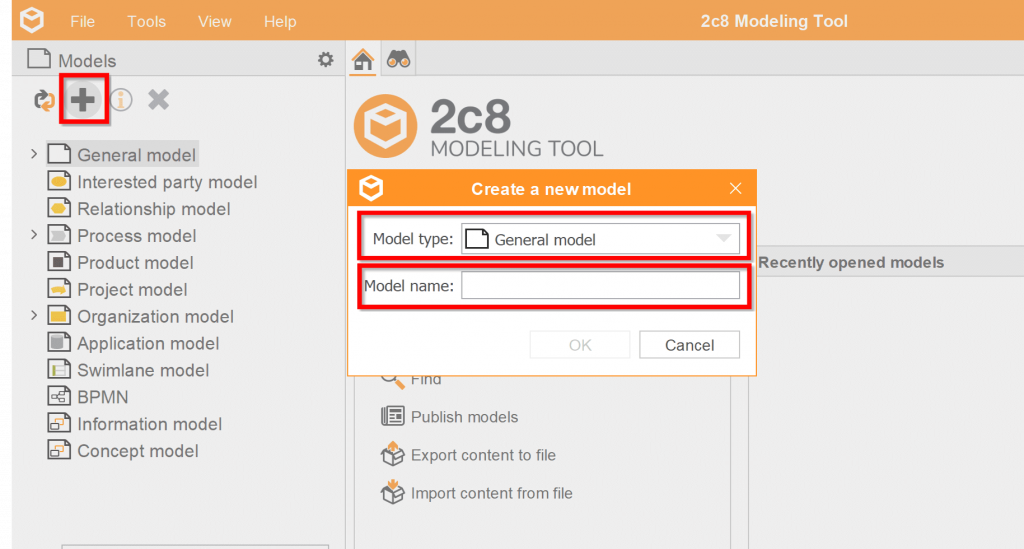
To create a new model:
- In the model tree, select the desired model type.
- Click on the plus sign in the menu.
- Write the name of your model in the pop-up.
Quic draw
Quick draw will facilitate your future modeling experience. It is created to make you modeling faster and easier. With the help of the arrows surrounding the hovered object, you get suggestions of what objects are suitable to be placed around the already laid out object. The new object will automatically get a relation between them and be placed on a reasonable distance.
Add a description
Add a description to an object:
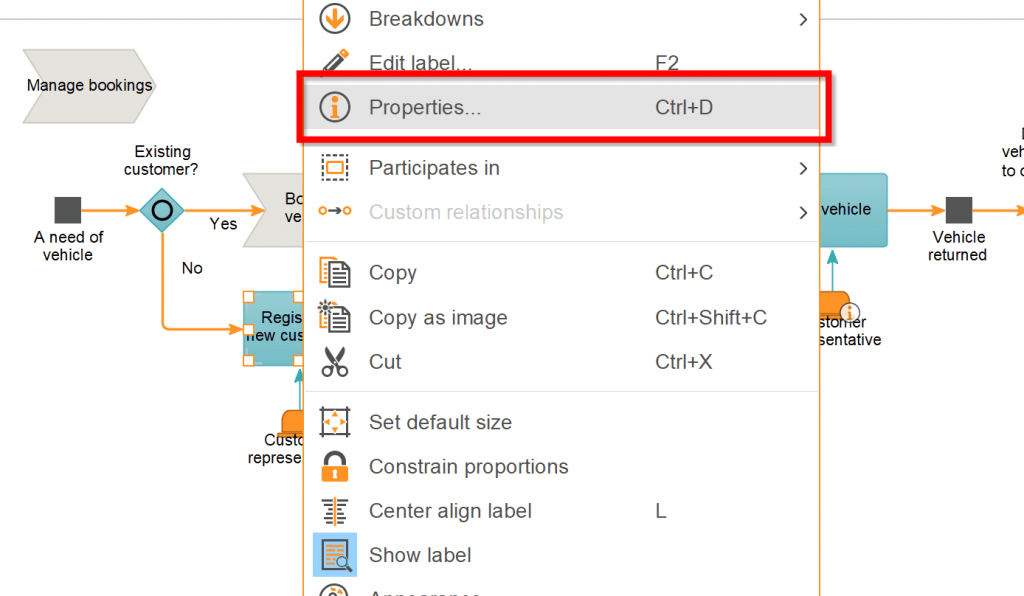
- Right click on the object.
- Choose ”Properties..”
- Write your description under the tab ”Description”.
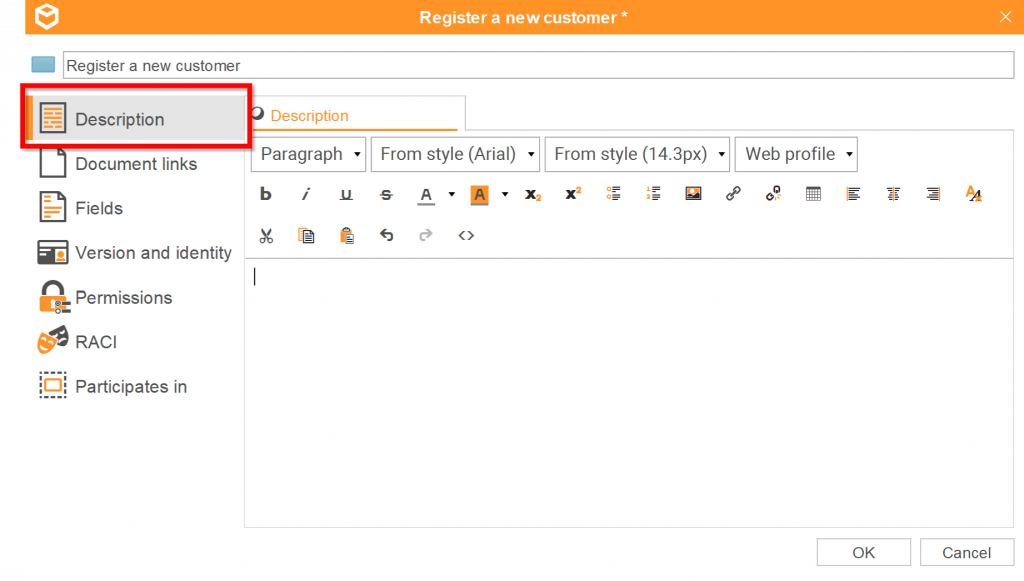
Note that if the description on an object does not appear in the published material or in the report it is because you need to add the description field in the publishing profile (report or web).
Create a document link
Create a document link:
- Click on ”Document links” in the left panel
- Click on the plus sign in the menu
- Write a title, use browse to find your link on your computer or paste an URL.
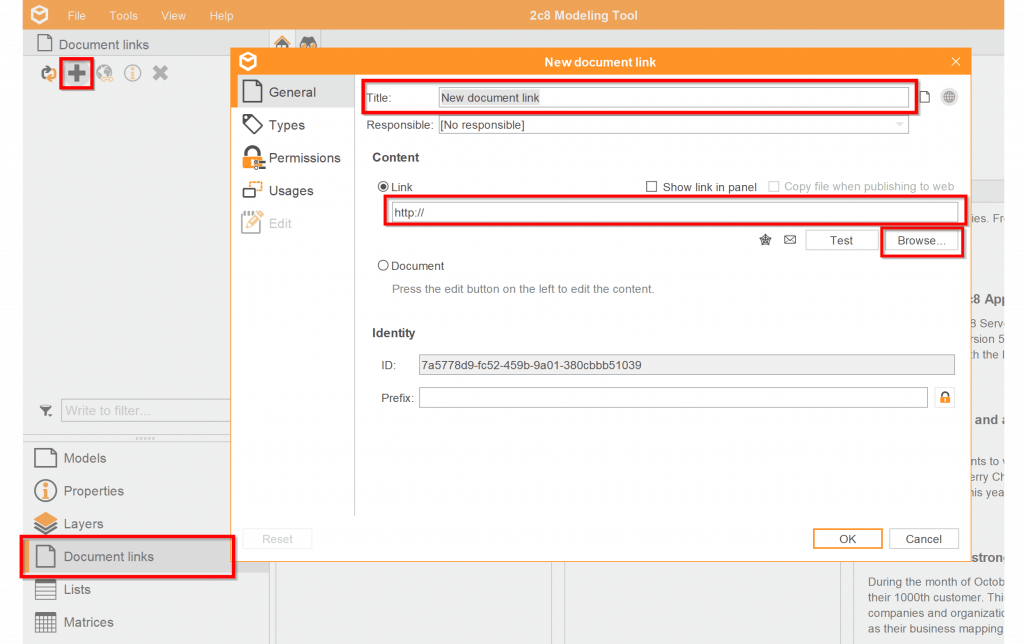
- When you are done, press OK and your new document link will show up in the left panel.
- To add to an object, “grab” the document link and “drop” it on the current object.
- When a link is connected to an object you will get a pop up in the lower right corner of the window.

A tip, if you have many different types of documents you can use “Types”, e.g checklists, instructions, templates etc. Then you can easily filter on the type of document when creating lists.
Create a breakdown
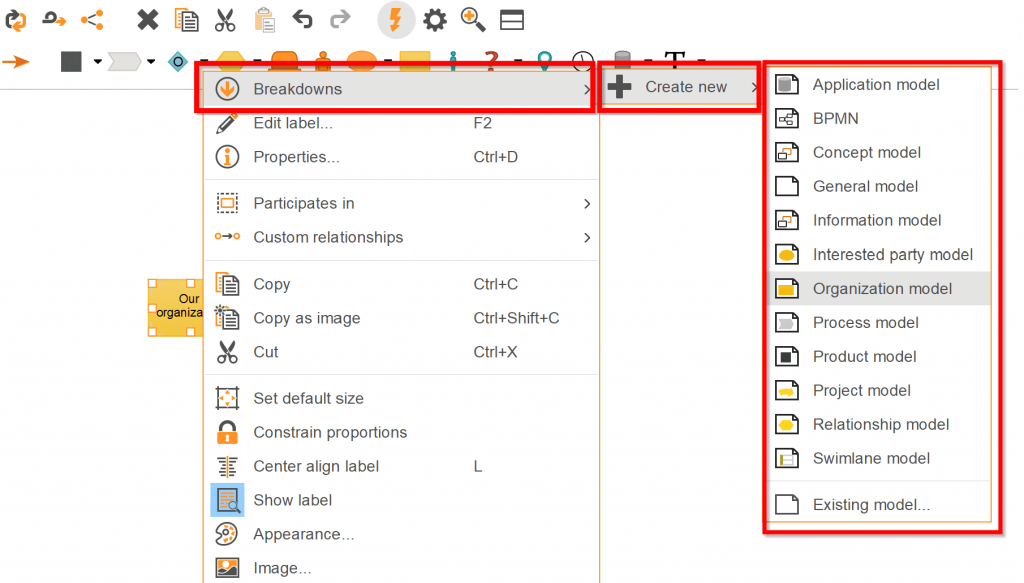
Right click on the object or relation to create a breakdown:
-
- Breakdowns – Create new – Desired model type.
- The new model will be opened in a new tab.
Create a list
You can create lists that contain, for example, models, activities, or document links. You can, among other things, use lists in your published material in the menu bar.
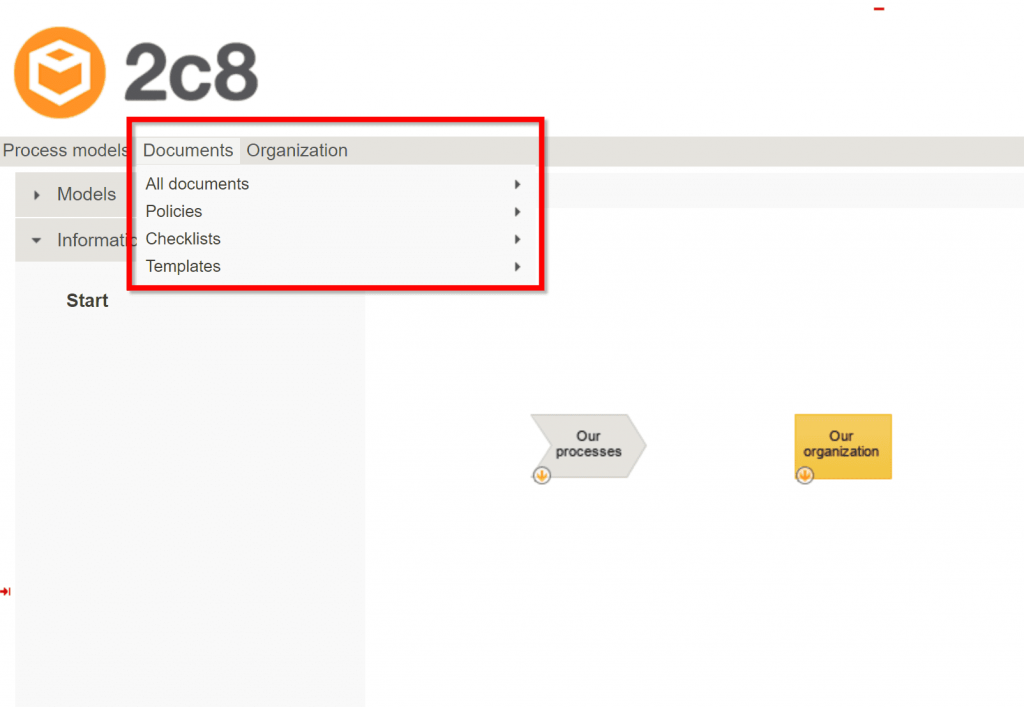
Create a new list:
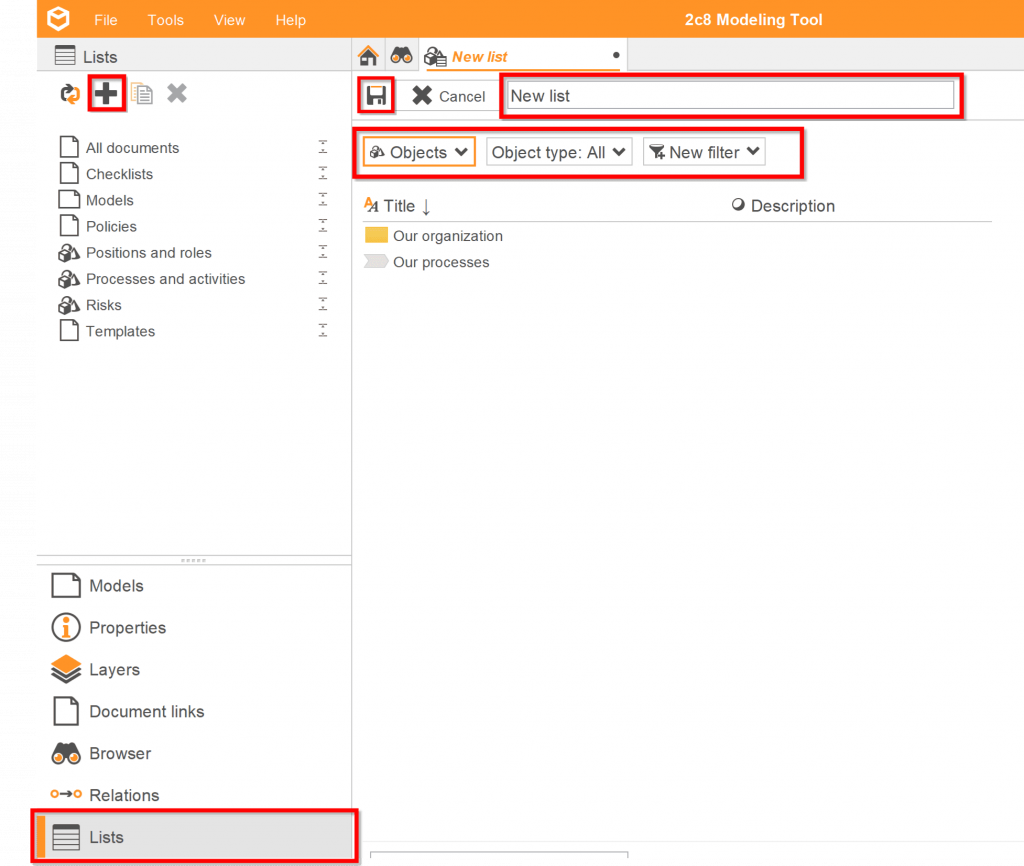
- Click on ”List” in the left panel.
- Click on the plus sign to create a new list.
- A new tab appears containing the list.
- Use the filters to show the result you want, for example on Objects.
- Select additional filters to specify the result further.
- Name the list.
- Save the list and it will appear in the left panel.
Create a layer
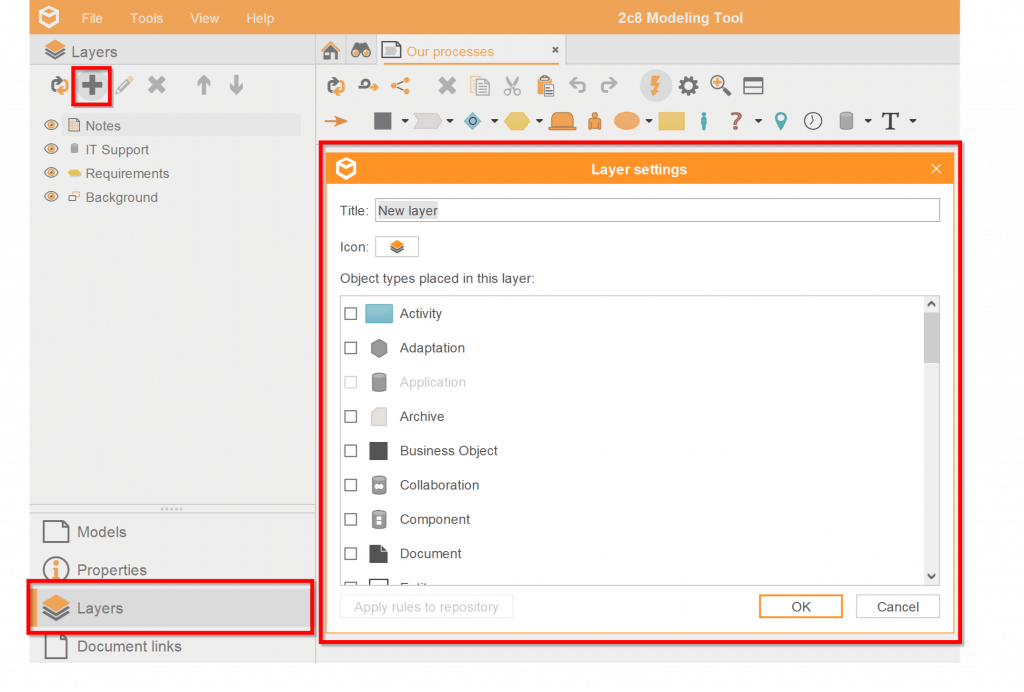
To create a layer and attach items to it:
- Open a model type where the layer will be used for example a process modell
- Click on “Layers” in the left panel
- Click on the plus sign in the menu to create a new layer
- Write a title, choose an icon and select objects that the layer will contain.
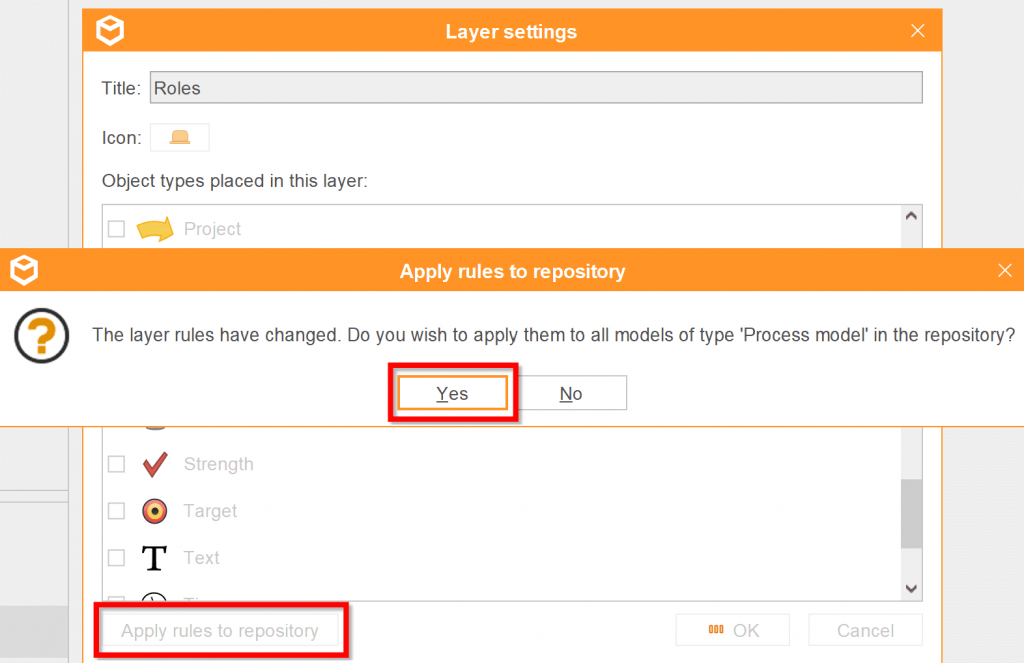
- You will get a question asking if you wish to apply the new layer rules on all models of the current type in the repository. If answering “Yes” all objects that have already been placed will adjust to fit the new layer rules. If answering “No” only new objects that are being placed will follow the new layer rules. If clicking “No” you can adjust all objects afterwards by editing the layer and clicking the button “Apply rules to repository”.
